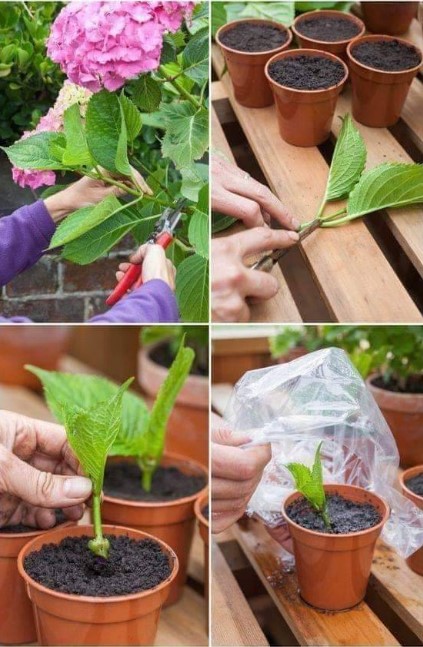
Growing hydrangeas from cuttings is an enjoyable and rewarding process. Here’s a simplified guide to help you get started:
1. Choose Your Cutting: Select a healthy, non-flowering stem with new growth, about 5-6 inches long, and with two sets of leaves.
2. Prepare the Cutting: Cut the stem at a 45-degree angle and remove all but the top two leaves. Optionally, dip the cut end into rooting hormone to enhance root development.
3. Plant the Cutting: Use well-draining potting soil mixed with perlite or vermiculite. Make a hole in the soil, insert the cutting, and firm the soil around it.
4. Create a Mini Greenhouse: Cover the pot with a plastic bag or plastic cover to create a humid environment. Ensure the plastic doesn’t touch the leaves.
5. Care for Your Cutting: Place the pot in bright, indirect light and keep the soil consistently damp. Check for condensation inside the bag and adjust ventilation as needed.
6. Check for Root Growth: After 2-4 weeks, gently tug on the cutting to check for resistance, indicating root growth.
7. Transplant Your New Hydrangea: Once the cutting has a healthy root system, transplant it into a larger pot or directly into the garden. Choose a spot with morning sun and afternoon shade, and water the plant well after transplanting.
8. Remember, patience is key, and not every cutting will root successfully. With time and care, you’ll enjoy the beauty of your new hydrangea plants.
